In this tutorial, I will show you how to copy columns width and rows height in Excel.
But before this, let’s see why and when this can be useful for you. Well, you might want to copy the columns width or rows height to speed up formatting a new worksheet to match the layout of a pre-existing one, or just to set the same column widths or row heights of a range of cells to another one.
A/ How to copy columns width in Excel
There are 3 methods of copying columns width in Excel: by using the copy paste, through the Format Painter tool, or by using the Paste Special feature.
I show you each method in the following sections.
Note: I’m talking here about literally copying the columns width to apply it to other columns, and not just checking the width of the columns or cells and setting the same size to another ones using the cell format command; for this, you can just check How To Change the Columns Width and Rows Height in Excel.
1- How to copy columns width in Excel using copy paste
The first and easier method to copy columns width in Excel is to use a simple copy paste. So:
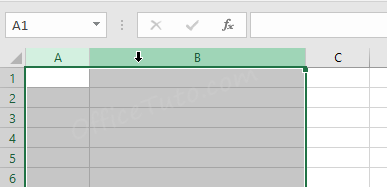
- Select the heading(s) of the column(s) you want to copy the width.
- Press Ctrl + C to copy the content of the source column(s), or just click the “Copy” command in the “Home” tab.
- Go to the target columns where you want to apply the same column width.
- Press Ctrl + V to paste the copied content, or just click the “Paste” command in the “Home” tab.
- Excel pastes the source content and its formatting, while keeping the width of the source column(s).
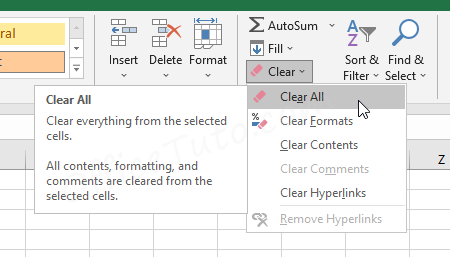
- Remove the copied content and formatting, if any, if you don’t need it:
- Select it, go to the “Editing” group of the “Home” tab, then click on the “Clear All” command of the “Clear” drop-down.
Note: It’s imperative when copying to select the entire columns and not only a range of cells; otherwise, you will just copy the content and not the columns width.
As you notice, this is an easy method to copy a column’s width in Excel; however, it has the drawback that you’ll also copy the source cell content and its formatting (fonts, colors, borders…), which you’ll need to clean afterwards if you don’t need it.
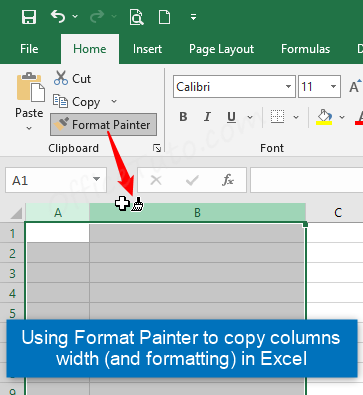
2- How to copy columns width in Excel using Format Painter
You can copy columns width in Excel using the Format Painter feature, as follows:
- Select the heading(s) of the column(s) you want to copy the width.
- Go to the “Clipboard” group of command in the “Home” tab.
- Click on the “Format Painter” tool.
- Go to the target columns where you want to apply the same column width.
- Select the entire column(s) by the heading(s).
- Excel applies the same width and formatting of the source column(s) to the destination one(s).
- Remove the formatting from the target columns, if any, if you don’t need it, as follows:
- Select the column(s), then go to the “Editing” group of the “Home” tab and click on the “Clear All” command of the “Clear” drop-down.
Note: It’s imperative when pasting to select the entire columns and not only a range of cells; otherwise, you will just copy the content and not the columns width.
This method is so easy, but it has the drawback of copying the column(s) width along with the formatting (fonts, colors, borders…); so, you’ll need to clean this formatting afterwards if you don’t need it.
3- How to copy columns width in Excel using Paste Special
The effective method to copy the columns width in Excel is to use the paste special feature. To do that:
- Select the heading(s) of the column(s) you want to copy the width.
- Press Ctrl + C, or just click the “Copy” command in the “Home” tab.
- Go to the target columns where you want to apply the same column width.
- Right click on the column heading, and choose “Paste Special”.
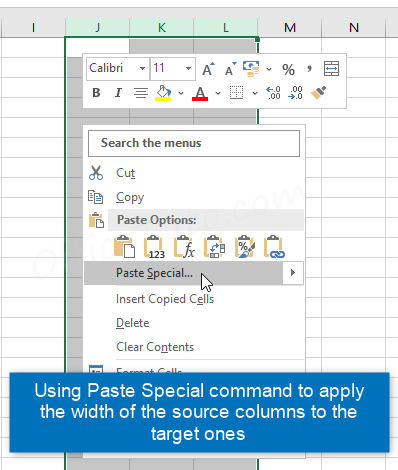
- The Paste Special dialog box displays.
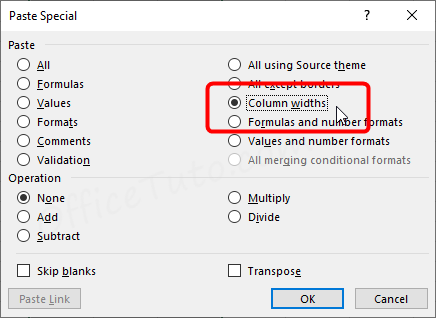
- Check the “Columns Widths” option and click OK.
- Excel applies the same width of the source column(s) to the destination one(s).
Using the Paste Special feature to copy columns width in Excel is my preferred method over the copy-paste or format painter ways, as it has the major advantage of applying the original cell sizes to the target ones without copying any content or formatting.
Note: There is another way to use the Paste Special feature in the newer versions of Excel. Just click the “Paste Special” drop-down from the right-click and choose “Keep Source Column Widths” option.
B/ How to copy rows height in Excel
There are 2 methods of copying rows height in Excel: by either using the copy paste, or through the Format Painter tool.
I cover both methods in the following sections.
Note: I’m talking here about literally copying the rows height to apply it to other rows, and not just checking the height of the rows or cells and setting the same size to another ones using the cell format command; for this, you can just check How To Change the Columns Width and Rows Height in Excel.
1- How to copy rows height in Excel using simple copy paste
The first and easier way to copy the rows height in Excel is to use the copy paste method. So:
- Select the heading(s) of the row(s) you want to copy the height.
- Press Ctrl + C to copy the content of the source row(s), or just click the “Copy” command in the “Home” tab.
- Go to the destination where you want to apply the same row height.
- Press Ctrl + V to paste the copied content, or just click the “Paste” command in the “Home” tab.
- Excel pastes the source content and its formatting, while keeping the height of the source row(s).
- Remove the copied content and formatting, if any, if you don’t need it:
- Select it, go to the “Editing” group of the “Home” tab, then click on the “Clear All” command of the “Clear” drop-down.
Note: It’s imperative when copying to select the entire rows and not only a range of cells; otherwise, you will just copy the content and not the rows height.
As you notice, the copy paste method is an easy way to copy a row’s height in Excel; however, it has the drawback that you’ll also copy the source cell content and its formatting (fonts, colors, borders…), which you’ll need to clean afterwards if you don’t need it.
2- How to copy rows height in Excel using Format Painter
You can copy rows height in Excel using the Format Painter feature, as follows:
- Select the heading(s) of the row(s) you want to copy the height.
- Go to the “Clipboard” group of command in the “Home” tab.
- Click on the “Format Painter” tool.
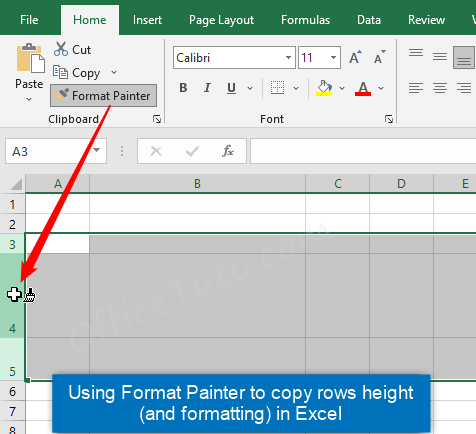
- Go to the target rows where you want to apply the same row height.
- Select the entire row(s) by the heading(s).
- Excel applies the same height and formatting of the source row(s) to the destination one(s).
- Remove the formatting from the target row(s), if any, if you don’t need it, as follows:
- Select the row(s), then go to the “Editing” group of the “Home” tab and click on the “Clear All” command of the “Clear” drop-down.
Note: It’s imperative when pasting to select the entire rows and not only a range of cells; otherwise, you will just copy the content and not the rows height.
This method is so easy, but it has the drawback of copying the row(s) height along with the formatting (fonts, colors, borders…); so, you’ll need to clean this formatting afterwards if you don’t need it.
C/ Wrap up
In this tutorial, I showed you how to copy column(s) width and row(s) height in Excel by using different methods.
My preferred method of copying columns width in Excel is by using the Paste Special feature, as it applies only the width of the source columns to the target ones; while for copying rows height, I find both methods (copy pasting or using the Format Painter) comparable.

Jeff Golden is an experienced IT specialist and web publisher that has worked in the IT industry since 2010, with a focus on Office applications.
On this website, Jeff shares his insights and expertise on the different Office applications, especially Word and Excel.