Converting an Excel spreadsheet or workbook to a PDF has so many advantages that allow users to easily share and print them:
- The PDF format is universal. All modern devices, operating systems, and browsers can easily read PDF documents. So, a user that receives an Excel workbook can view it without the need of having Excel on his device.
- The formatting of a PDF document is consistent. The PDF format ensures that the same format is kept without changes.
- No accidental changes can occur to a PDF document, unlike with a normal Excel workbook.
Now that we know why to convert an Excel spreadsheet to PDF, let’s see how we do it.
There are 4 ways to convert an Excel spreadsheet to PDF without a converter software:
- “Export as PDF” Excel feature.
- “Save as PDF” Excel feature.
- Use Google Drive download option.
- Use Win 10 “Microsoft print to PDF” feature.
I will detail each option in the following sections:
1- Convert Excel to PDF using “Export as PDF” feature
In Excel 2013 and newer, to convert an Excel workbook or spreadsheet to PDF, you can use “Export as PDF” feature:
- To convert just a range of cells, select it.
- In the ribbon, click on “File”, then “Export”.
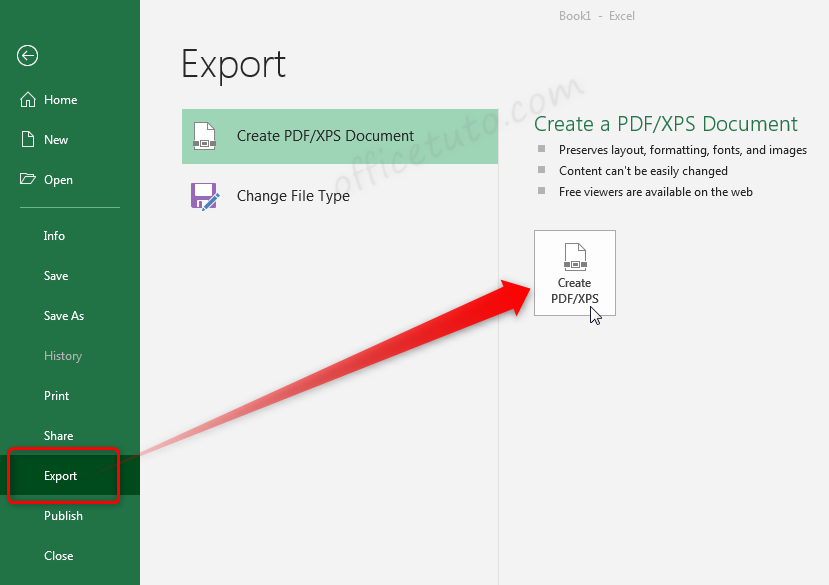
- Click on the “Create PDF/XPS” button.
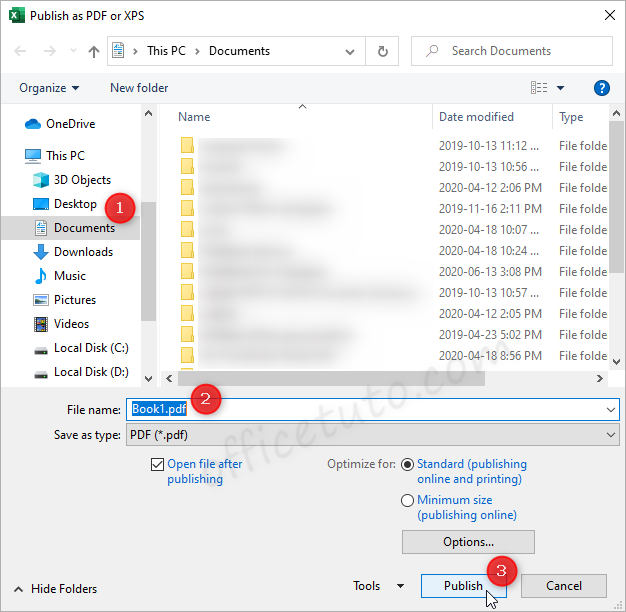
- Choose where to create the PDF.
- Enter a name for it in the “File name” field.
- Finally, click on “Publish”.
This is the method I prefer the most, as it is the easiest and more convenient one; the drawback of it is that it’s only available for Excel versions from Excel 2013.
– Settings for the PDF doc in the “Publish as PDF” dialog box
When exporting an Excel file to PDF, you can set the settings for your PDF document in the “Publish as PDF or XPS” dialog box:
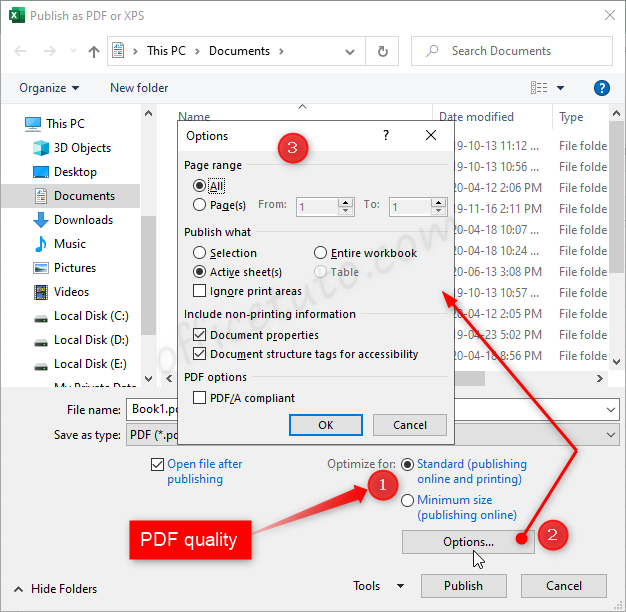
- Start by choosing between a standard or minimum quality in the “Optimize for” option. The standard option is intended for both publishing online and printing with good quality, whereas the minimum size option is for publishing online only with less quality but smaller file size.
- The button “Options” provide additional settings, such as which pages to export as PDF, the source of data (selected range of cells, the entire sheet, or the entire workbook), and whether to ignore the print area (if applied) or not.
2- Convert Excel to PDF using “Save as PDF” feature
To convert an Excel workbook or spreadsheet to PDF, you can use the “Save as PDF” feature:
- To convert just a range of cells, select it.
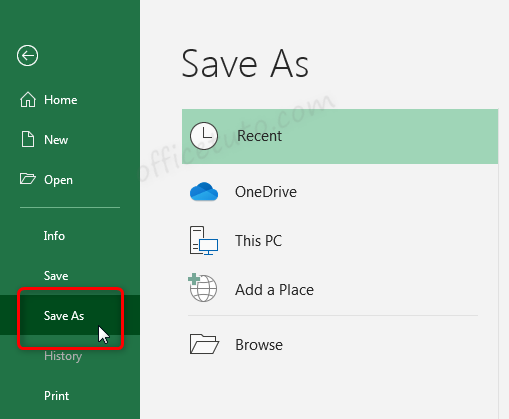
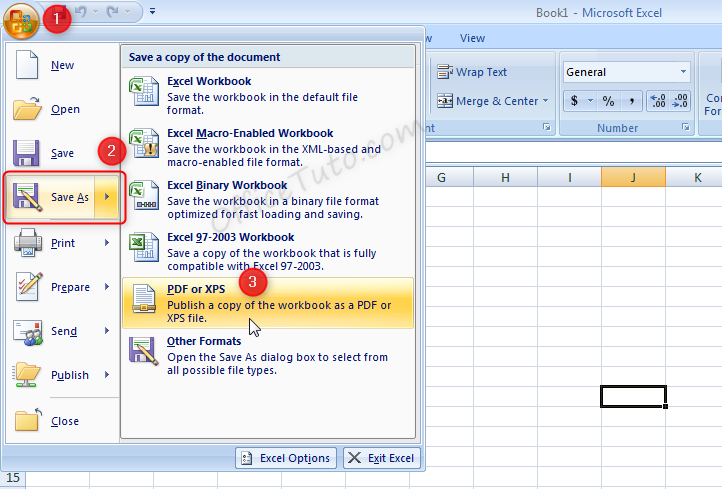
- Click on “File” (Office Button in Excel 2007).
- Then, click on “Save As”.
- In “File name” field, enter a name for the PDF.
- In the “Save as type” field, choose “PDF”.
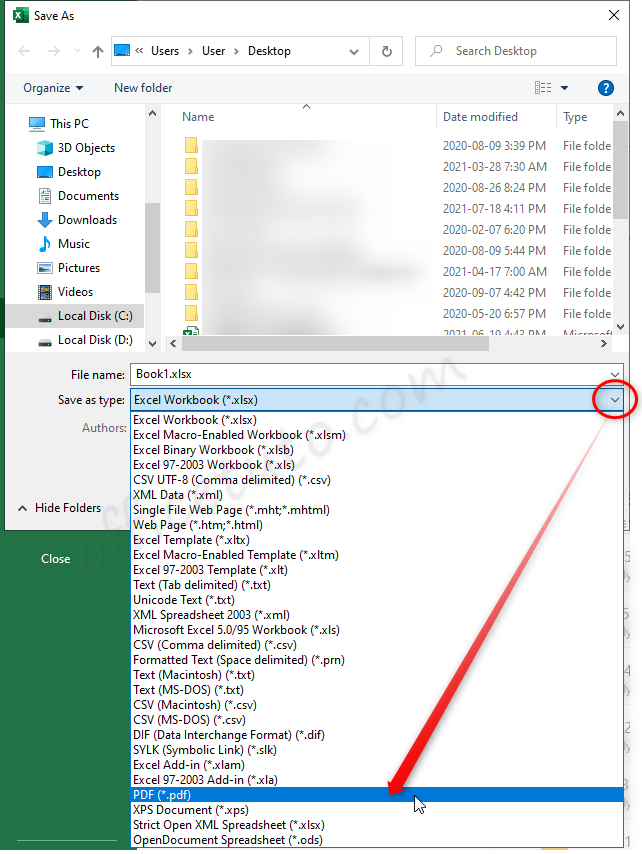
- Finally, click “Save”.
The advantage of the “Save As” method is that it is available for all versions from Excel 2007.
Note: In Excel 2007, you can have the “Save as PDF” directly after the “Save As” option, as illustrated in the image below, if you have the “Save As PDF and XPS” Add-in is installed (see the following section).
– How to enable “Save as – PDF or XPS” in Excel 2007
The “Save as PDF or XPS” option is not present by default in Excel 2007, so you may need to add it by installing the Microsoft Office 2007 Add-in:
– Settings for the PDF doc in the “Save as PDF” dialog box
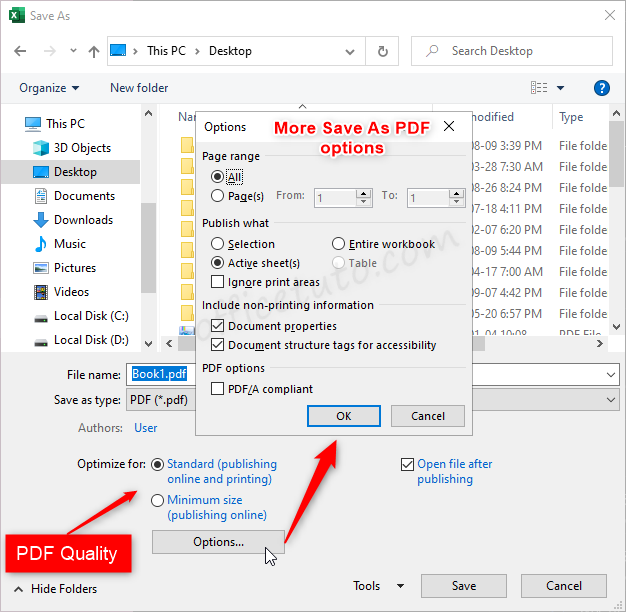
When saving an Excel workbook as PDF, you can use the “Save as PDF” dialog box to set the settings for the PDF document :
- In the “Optimize for” section, you can choose to create your PDF with a standard quality that is suitable for both publishing online and printing, or with a minimum quality that produces a PDF document with less quality but small size, more suitable for online use.
- You can also click on the “Options” button to set other settings, like: which pages to save as PDF; convert the entire sheet or workbook, or just a selection of cells; and take or not into consideration the print area (if any).
3- Convert Excel to PDF Using Google Drive download option
To convert an Excel spreadsheet to PDF without using Excel, you can use Google Drive:
- Upload your Excel workbook to Google Drive.
- Open it in Google Drive
- To convert just a part of the sheet, select it.
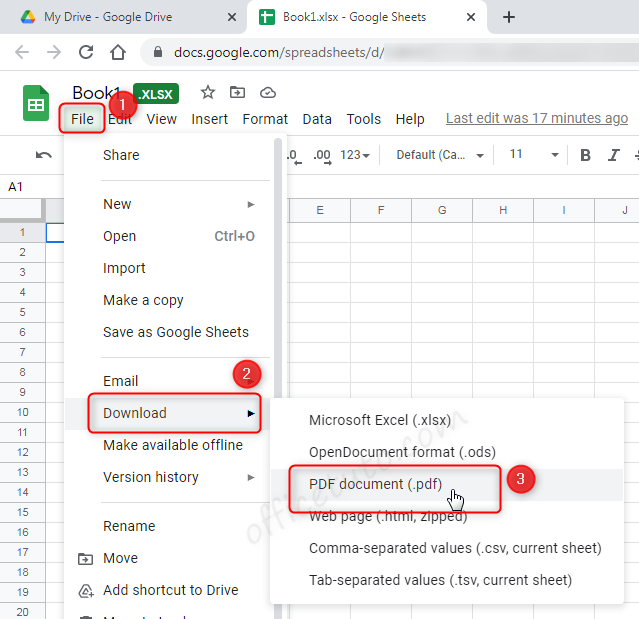
- Click on “File”, then “Download”
- Then, click on “PDF document”.
- Customize the layout and printing settings.
In the right panel of the “Print settings” page, you can set there whether to export to PDF just the selected range of cells, or the entire sheet; you can also set the paper size, the orientation (landscape or portrait), the scale and margins, whether to show gridlines and notes, the horizontal and vertical alignments of the content. You can set as well whether to display the workbook and sheet names, the page number, and the current date and time. Finally, you can set whether to display or not the frozen rows and columns on all pages.
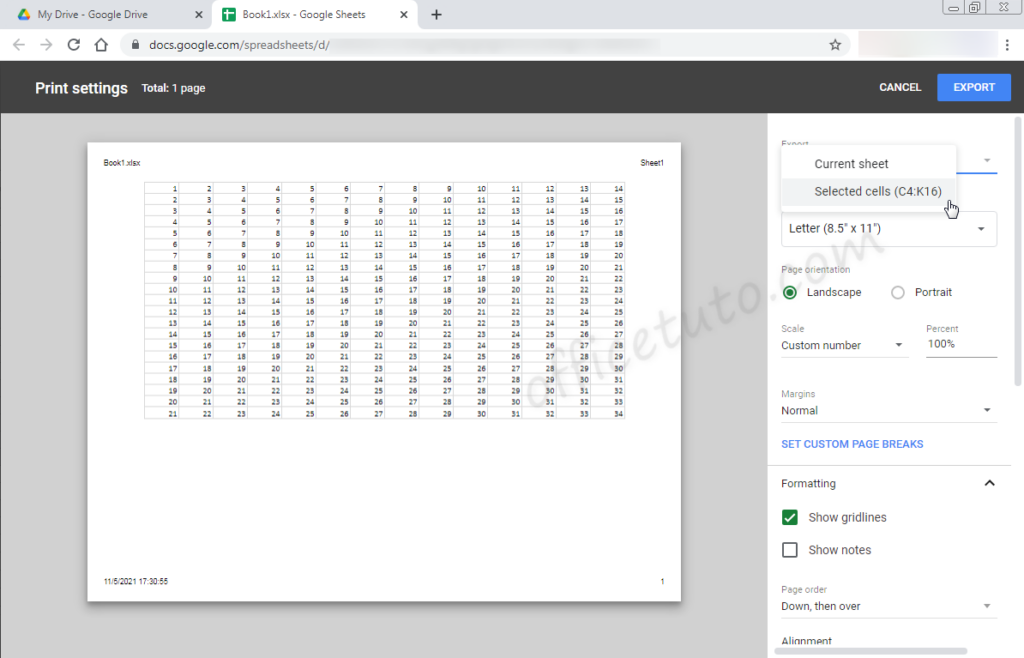
- Click on “Export” in the top-right corner.
This method has the advantage of being able to convert an Excel spreadsheet to PDF without having Excel on your device.
4- Convert Excel to PDF with Win 10 “Microsoft Print to PDF”
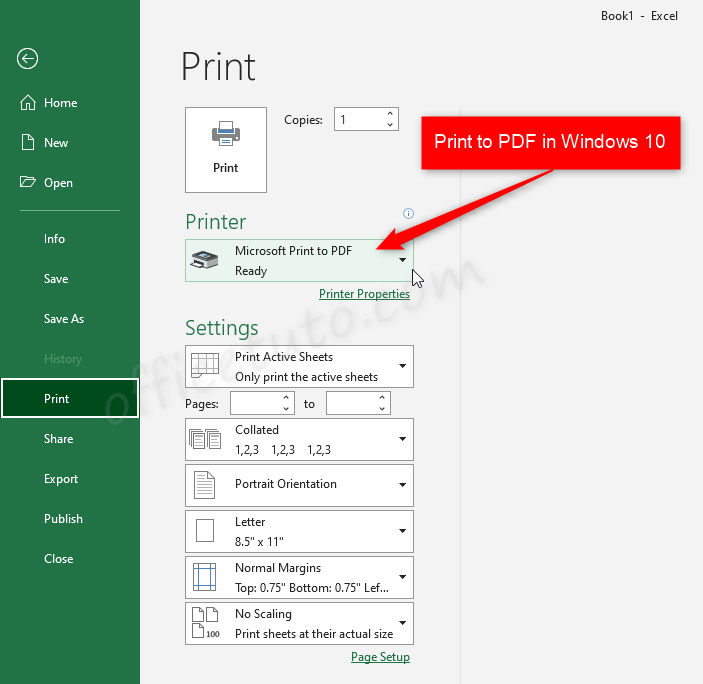
In Windows 10, and additionally to “Save As PDF” and “Export” Excel features, you can convert an Excel spreadsheet or workbook to PDF using “Microsoft Print to PDF” feature:
- In Excel, click on “File”, then on “Print”.
- As a printer, choose “Microsoft Print to PDF”
- Customize the printing settings
- Click on the “Print” button at the top.
- Browse to where you want to save your PDF.
- Name the file in the “File Name” field.
- Click on “Save”.
I personally don’t think this method has any advantages over the other three, especially “Save As PDF” and “Export” methods, unless you are already on the print preview page; but, yeah, it’s another way to do, which is always good to know.
– How to fix layout issues when converting Excel to PDF
When converting an Excel workbook or spreadsheet to PDF, you might find that the layout of the PDF document you get is different from what you expected.
Examples of layout issues after converting Excel to PDF:
- Getting multiple PDF pages instead of just one page;
- Getting all the info in only one page instead of multiple pages;
- Only a part of the data is converted to PDF.
The main reason behind these issues is because you didn’t correctly set up the layout of your Excel sheet prior to the conversion to PDF.
To fix the layout issue when converting an Excel sheet to PDF, you need to apply one of the following solutions:
Note: Depending on the layout issue you encounter, you may need to apply only one solution or more than one.
a- Select the desired range before converting
- Select the range of cells you want before converting your Excel sheet to PDF.
- Apply the conversion to just the selected range, and not to the entire sheet or workbook.
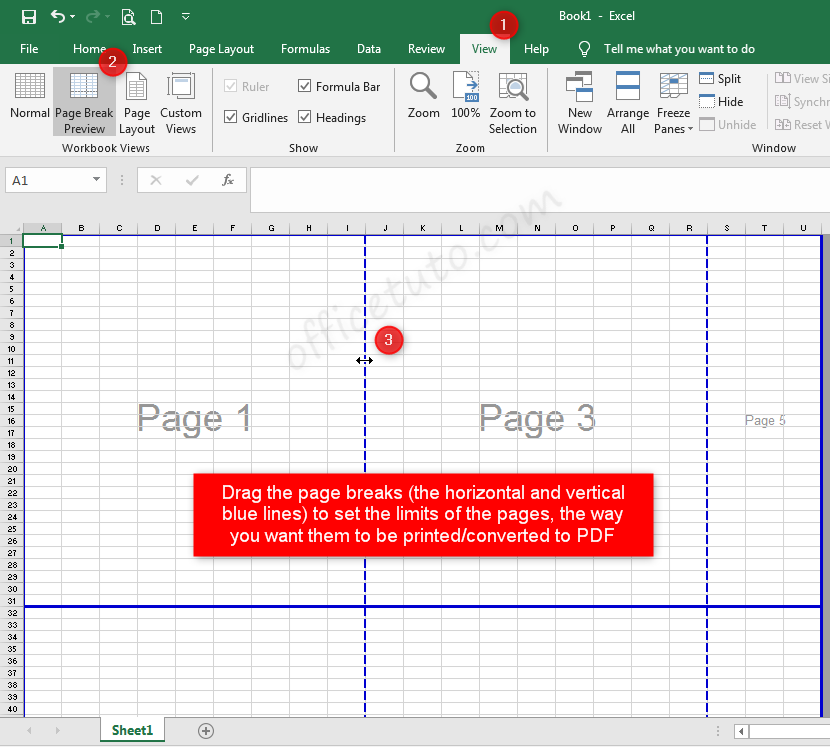
b- Dynamically set the limits of the pages
- Click on the “Page Break Preview” in the “View” tab of Excel ribbon.
- Drag the page breaks (horizontal and vertical blue lines) to set the limits of the pages.
- When you get the layout you want, convert to PDF.
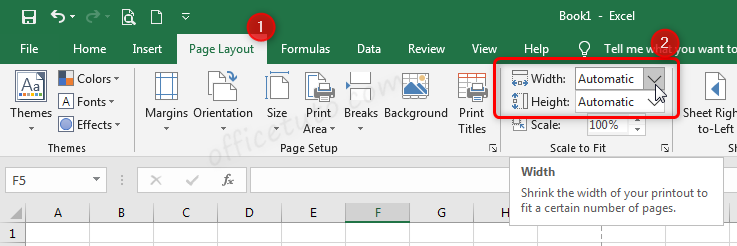
c- Set the number of pages for the sheet
- Click on the “Page Layout” tab of Excel ribbon.
- Go to “Scale to Fit” group.
- Set the number of pages in the “Width” and “Height” fields.
- (Optional) Click on the “Page Break Preview” in the “View” tab of Excel ribbon.
- (Optional) Drag the page breaks (blue lines) to set the boundaries of the pages.
- When you get a satisfying layout, convert to PDF.
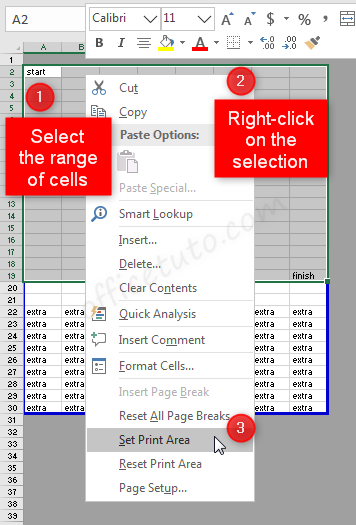
d- Set a print area
- Select the range of cells you want to convert to PDF.
- Right-click on the selection.
- Choose “Set Print Area”.
- (Optional) Click on the “Page Break Preview” in the “View” tab of Excel ribbon.
- (Optional) Drag the page breaks (blue lines) to set the boundaries of the pages.
- When you get the desired layout, convert to PDF.
– Wrap up
In this tutorial, I listed for you 4 methods to convert an Excel spreadsheet or workbook to a PDF document without a converter software: the first two ones are Excel built-in features (“Export as PDF” and “Save as PDF” Excel features), and the other two use external tools (Google Drive download option, and Windows 10 “Microsoft print to PDF” feature).
I also showed you, in the second part of this tutorial, how to troubleshoot some layout issues that may arise when converting from Excel to PDF.

Jeff Golden is an experienced IT specialist and web publisher that has worked in the IT industry since 2010, with a focus on Office applications.
On this website, Jeff shares his insights and expertise on the different Office applications, especially Word and Excel.