When you create a workbook in Excel, you’ll notice that the cells have the same default size (width and height). These default dimensions are usually fine, but if you have repetitive needs to always change the columns width or rows height before any data entry, you might need to set new default values to use each time a workbook is created, which will save you a lot of time and effort.
A/ Set a default column width in Excel
You can set a new default column width for the current workbook or worksheet, or for all new Excel workbooks. Here is how:
1- Set default column width for current worksheet or workbook
You can set a new default column width in Excel for the active worksheet, or for the entire current workbook, by following these steps:
- For all worksheets of the current workbook, right-click on a sheet tab and choose “Select All Sheets”;
- Otherwise, to apply for the active sheet only, just click its tab.
- Go to the “Home” tab.
- In the “Cells” group, click on the “Format” drop-down.
- Click on “Default Width”.

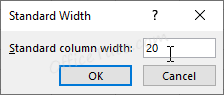
- The “Standard Width” dialog box displays.
- Enter a new default value for the columns width and click OK.
- Excel applies the new column width for new inserted columns and existing ones that weren’t previously resized by the user.
2- Set a default column width for all new workbooks using a personal template
To set a default column width for all new workbooks in Excel, you’ll need to create a template with the column width you want and base the new workbooks on it.
So, you will:
a- Create an Excel workbook template with the custom column width.
b- Base your new workbooks on this Excel template.
c- Make your personal workbook template the default one (extra step/not mandatory).
d- Make all newly created sheets have the same column width as the new default workbook (extra step/not mandatory).
OK; let’s see now, in detail, how to set a default column width for all new workbooks in Excel:
a- Create an Excel workbook template with the custom column width
- Firstly, open a new Excel workbook.
- In the “Cells” group the “Home” tab, click on the “Format” drop-down.
- Click on “Default Width”, enter a new default value for the columns width and click OK.
- Click on “File” (or Office Button for Excel 2007), then on “Save”.
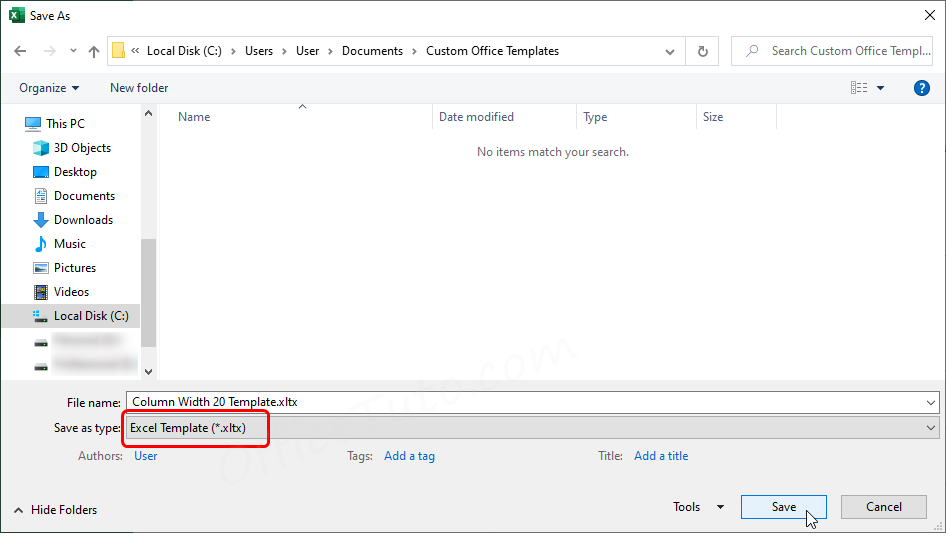
- The “Save As” dialog box displays (if not, select a location).
- In the “File name”, put a distinctive name for the template workbook.
- In the “Save as type”, choose “Excel Template”, then click on “Save”.
- Excel saves your personal template in the appropriate templates folder.
Now that we have prepared a template with our custom column width, let’s see how to base the new workbooks on it.
b- Base your new workbooks on your personal Excel template
To use the previously created template with its custom column width:
- Open Excel (In Excel 2007, you’ll need also to click on the Office Button).
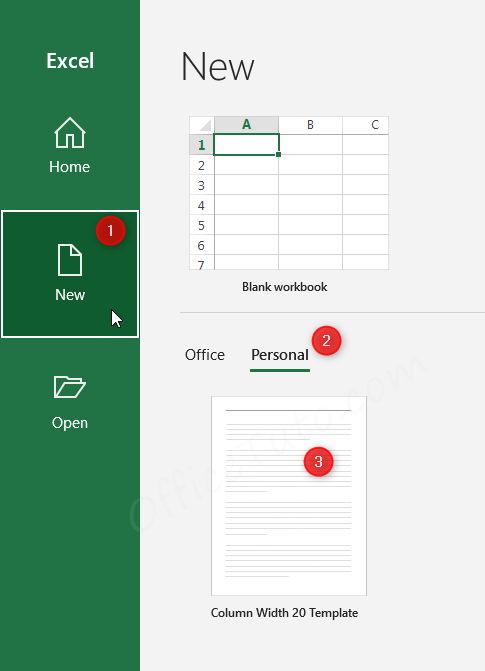
- Click on “New”.
- For Excel 2013 and newer, click on “Personal” label.
For Excel 2010, click on “Available Templates”, then “My templates”.
For Excel 2007, click on “Templates”, then “My templates”. - Click on your personal template with custom column width.
- Excel creates a new workbook with the custom column width set by your template.
With these two steps applied (a and b), you can now manually choose your own template, other than the default one, each time you want to create a new workbook; i.e., you’ll need to manually click on your template to create a new workbook based on it.
However, if you want your own template to be the default one and make Excel to automatically create any workbooks based on your template by default, apply the following step in addition of the two previously mentioned.
c- Make your personal workbook template the default one (extra step)
This step is not mandatory, but it will let you set your personal template as the default one; so, whenever you click on “New” to create a workbook, Excel will automatically do it based on your own template.
To do this, you’ll need to save the template with the name “Book” in the XLSTART folder (from where Excel will pick your new default template); then, you’ll need to disable the start screen of Excel, as the “New” command from Excel start screen is set to ignore any customizations and forces the use of the original Excel template.
Let’s first find the path to the XLSTART folder where we will save the new default template.
To locate XLSTART folder that Excel uses for the default templates:
- Click on “File” (or Office Button for Excel 2007).
- Then, click on “Options” (“Excel Options” for Excel 2007).
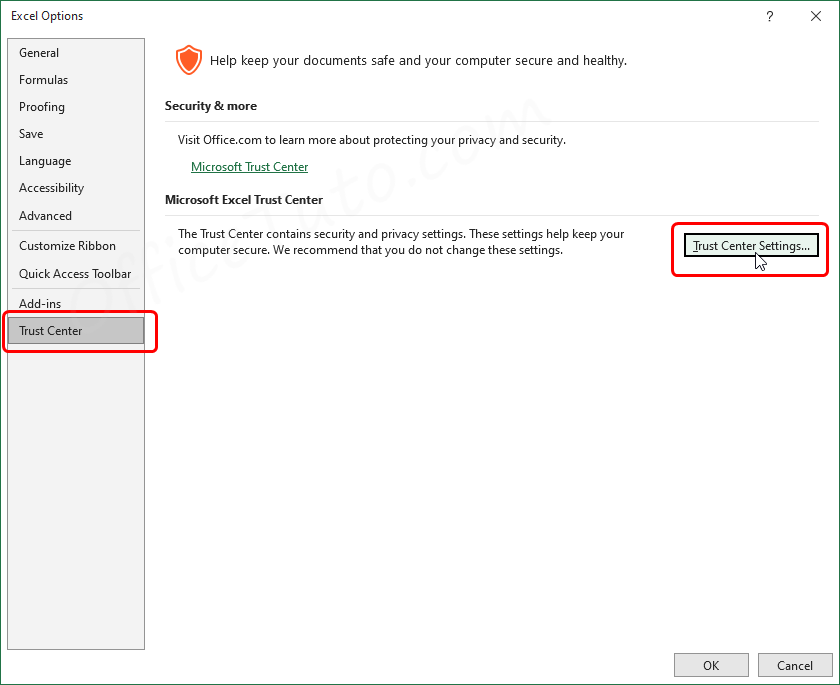
- The “Excel Options” window displays.
- Click on “Trust Center” section in the left pane, then on “Trust Center Settings” button on the right pane.
- The “Trust Center” dialog box displays.
- Click on “Trusted Locations” in the left pane.
- Look for the User Startup path to the “XLSTART” folder in the right pane.
- Double click on the path and copy it.
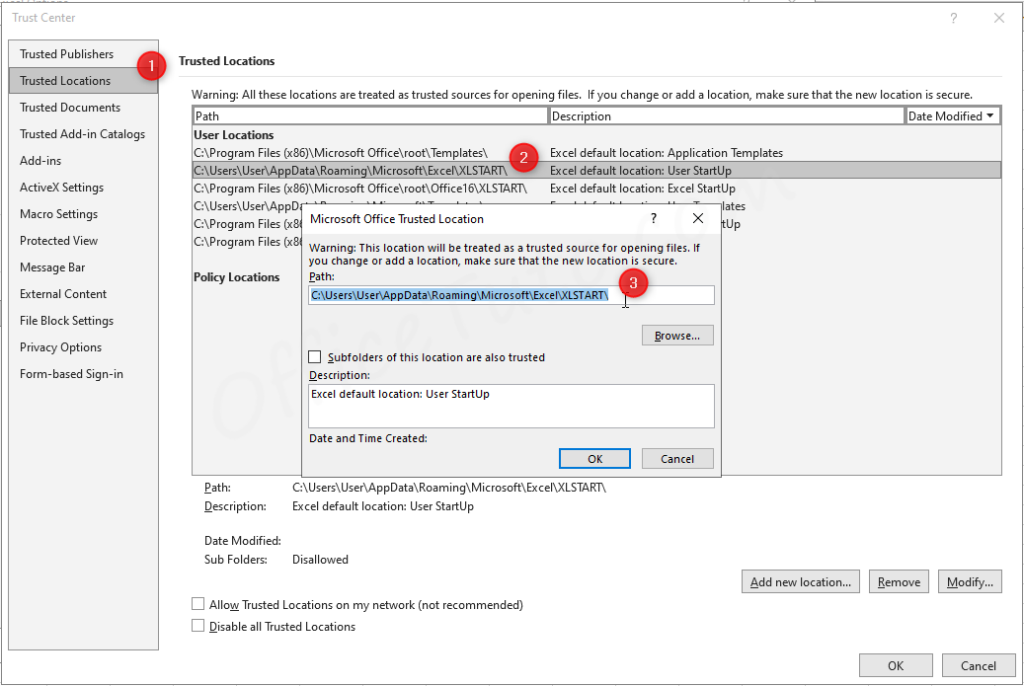
The path for the “XLSTART” folder depends on the Windows and Excel versions; so, it can be:
- C:\Users\[Username]\AppData\Roaming\Microsoft\Excel\XLSTART
(Replace the [Username] by the username of your Windows account, without square brackets). - C:\Users\[Username]\AppData\Microsoft\Excel\XLSTART
(Replace the [Username] by the username of your Windows account, without square brackets).
Now, with the XLSTART folder located, let’s set the template as the default one for Excel.
So, to make your workbook template the default one for Excel:
- Open the template workbook you created with custom column width.
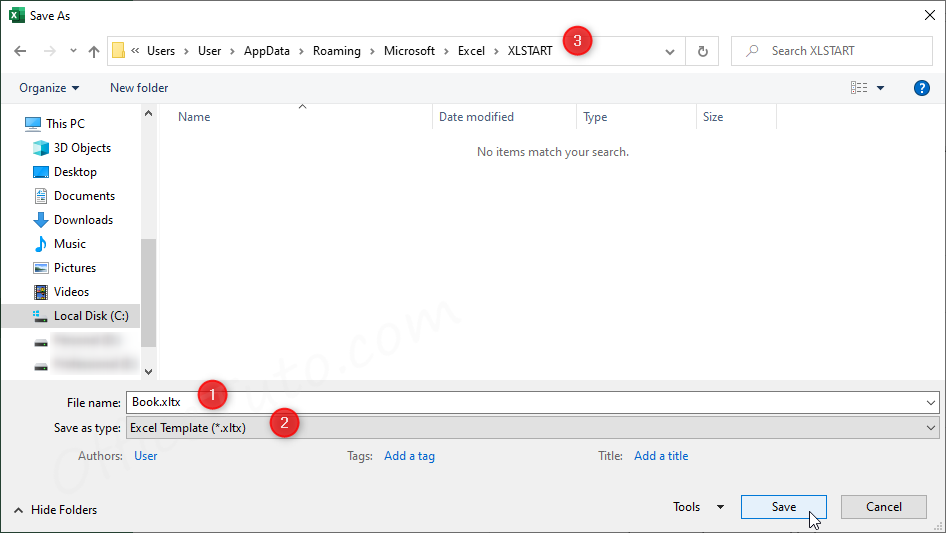
- Click on “File” (or Office Button for Excel 2007), then on “Save As”.
- The “Save As” dialog box displays (if not, select a location).
- In the “File name”, put “Book” as a name for the template (not any other name!).
- In the “Save as type”, choose “Excel Template”.
- In the address field at the top of the dialog box, paste the path to XLSTART folder and press Enter, or just browse to it.
- Then click on “Save”.
- Excel saves your personal template as the default template of Excel.
Note: Do these steps in the order; don’t paste the path or browse to it before choosing the type of the file as Excel Template, because when you choose “Excel Template” in the “Save as type” field, Excel automatically changes the path in the top to the “Custom Office templates” folder!
OK. You have now set your personal template as the default one; but there is an additional step required as the “New” command from Excel start screen is set to ignore these customizations and doesn’t provide the automatic opening of a workbook based on the new default template; so, the solution here is to bypass this start screen.
So, to disable Excel start screen:
- In Excel, click on “File” (or Office Button for Excel 2007).
- Then, click on “Options” (“Excel Options” for Excel 2007).
- The “Excel Options” window displays.
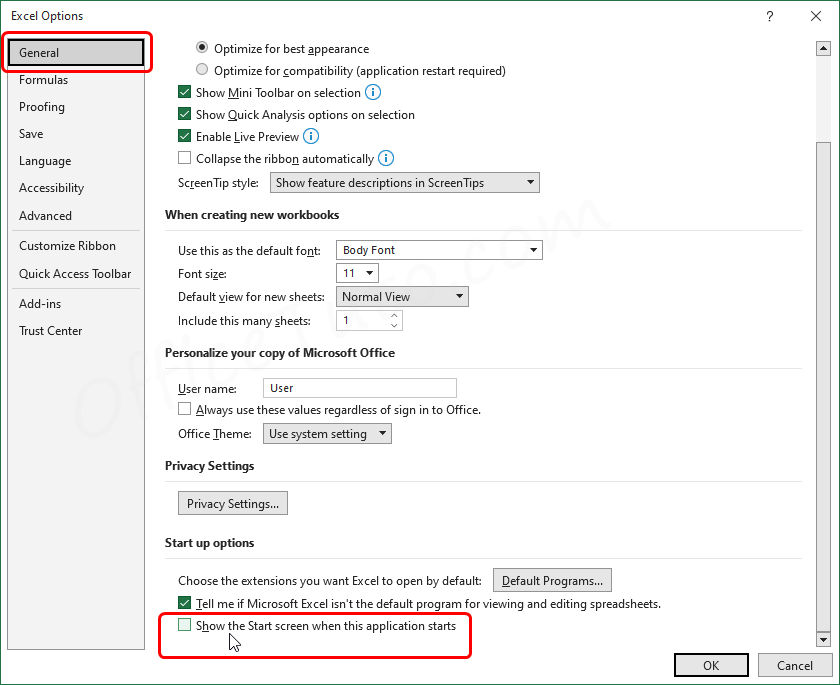
- Make sure the “General” section of the left pane is clicked.
- Go to “Start up options” sub-section at the very bottom.
- Uncheck “Show the start screen when this application starts” and click OK.
- Restart Excel.
- From now on, Excel will open directly on a new workbook without the start screen.
Note: Even with the start screen disabled, you can always reach the usual features provided in it by clicking “File” (or Office Button for Excel 2007), then “New” command.
With all the above steps applied, Excel will from now on open new workbooks based on your personal template, with the custom column width specified in it.
d- Make all newly created sheets have the same column width as the new default workbook (extra step)
This step is not mandatory, but it’s very important as it will let all newly created worksheets to have the same column width you set for your custom default workbook.
Why do you need this? Actually, without creating a new default sheet, Excel will use the original template when inserting a new sheet in a workbook, instead of picking it from the new default template.
Hence, you’ll need to save the template with the custom column width, under the name “Sheet” in the XLSTART folder (from where Excel will pick your new default template). See the previous section for the location of the XLSTART folder.
So, to create a new default sheet with the custom column width:
- Open the workbook template Book.xltx you’ve already customized, from the XLSTART folder.
- Keep only one sheet (delete other sheets if any).
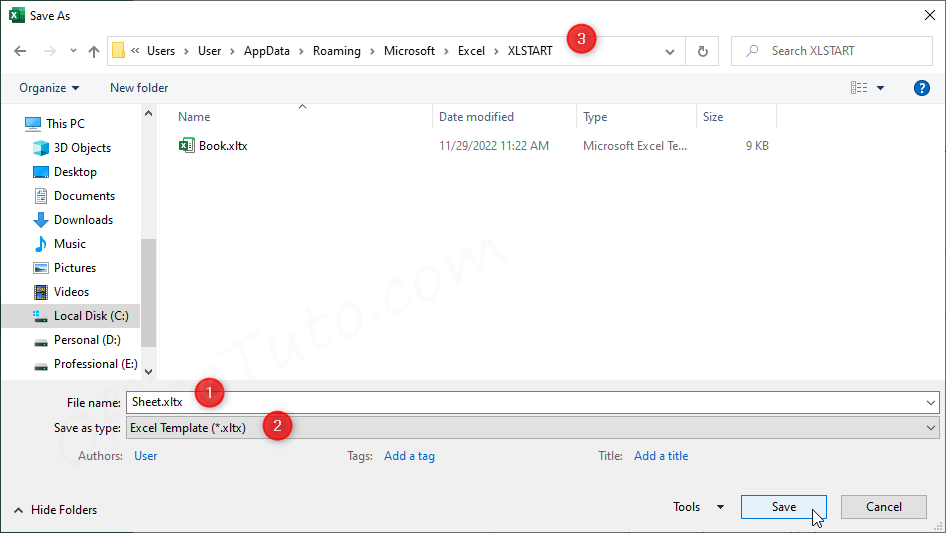
- Click on “File” (or Office Button for Excel 2007), then on “Save As”.
- The “Save As” dialog box displays (if not, select a location).
- In the “File name”, put “Sheet” as a name for the template.
- In the “Save as type”, choose “Excel Template”.
- In the address field at the top of the dialog box, put the path to XLSTART folder, or just browse to it.
- Then click on “Save”.
- Excel saves your personal sheet as the default sheet template of Excel.
- Restart Excel.
- From now on, whenever you create/insert a new worksheet in a workbook, it will be based on your new default sheet template, with the custom column width.
B/ Set a default row height in Excel
You can set a new default row height for the current workbook or worksheet, or for all new Excel workbooks. Here is how:
1- Set a default row height for a worksheet or workbook
You can set a new default row height in Excel for the active worksheet, or for the entire current workbook, by following these steps:
- For all worksheets of the current workbook, right-click on a sheet tab and choose “Select All Sheets”;
- Otherwise, to apply for the active sheet only, just click its tab.
- Press the keyboard shortcut Ctrl + A to select the entire sheet(s).
- Go to the “Home” tab.
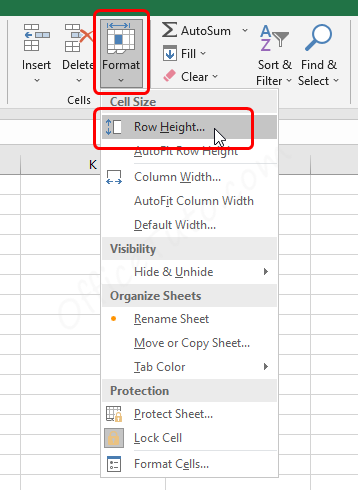
- In the “Cells” group, click on the “Format” drop-down.
- Click on “Row Height”.
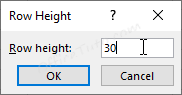
- Enter a new row height value in the dialog box and click OK.
- Excel applies the new row height for existing rows and new inserted ones.
Note: I used here the “Format” drop-down method to resize the height of rows, but I could also have used the dynamic method of drag and drop, as explained in detail in How to change the columns width and rows height in Excel.
2- Set default row height for all new workbooks by changing the font and/or its size
Setting a new default row height for new workbooks in Excel is a little trickier than for columns width. This is because there is no Default Height command in Excel to use, as the row height depends on the largest font used in the cells of this row.
So, as a workaround, you’ll need to change the default font size in Excel, or the font, in order to change the row height. This will apply to all workbooks, the active workbook and the future ones.
To change the font and/or its size in Excel, and then the default row height:
- Click on “File” (or Office Button for Excel 2007).
- Then, click on “Options” (“Excel Options” for Excel 2007).
- The “Excel Options” window displays.
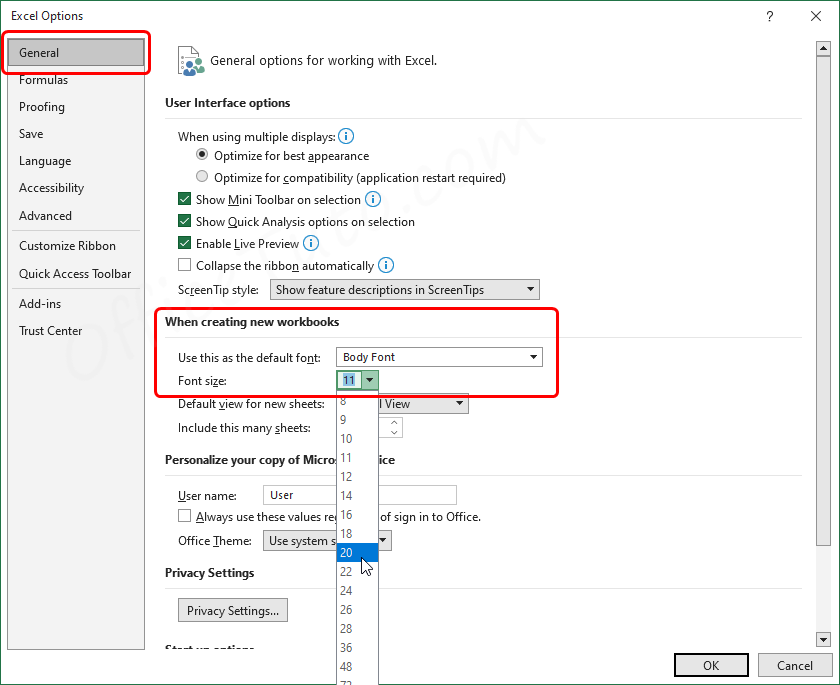
- Make sure the “General” section of the left pane is clicked.
- Go to “When creating new workbooks” sub-section.
- Set “Font size” to the value you want, or also change the font.
- Click OK and restart Excel.
- Excel automatically changes the row height of all new workbooks to fit the new font size.
Note that the new font size you choose aren’t the heights Excel will use for each row. However, this font size will allow Excel to adjust the row height based on it.
This is the easiest method of changing the default row height in Excel, and also the most flexible one as you can easily apply it as much as you want, whenever you need.
3- Set a default row height for all new workbooks via a personal template
The method of changing the font and/or its size to change the default row height is really the easiest one, so you probably don’t need this template method; however, there is one situation when you’ll need it, which is when you frequently use different workbooks with different default row height.
Creating new workbooks based on a template with custom row height will then allow you to choose multiple templates, based on what row height you need. For example, you can have a template with a default row height of 20, another one with a default row height of 20 but with other customizations, another one with a default row height of 25, etc.
Note: I don’t use here a measurement unit for the height of row as this is how Excel displays it in the Normal view; you can get more in-depth information about the measurement units used by Excel for the columns and rows in What are units of column width and row height in Excel.
So, to set a default row height for all new workbooks in Excel, using a personal template, you’ll need first to create this template with the row height you want, then base the new workbooks on it:
a- Create an Excel workbook template with custom row height
- Firstly, open a new Excel workbook.
- If you have more than one sheet, right-click on a sheet tab and choose “Select All Sheets”.
- Press the keyboard shortcut Ctrl + A to select the entire sheet(s).
- In the “Cells” group of “Home” tab, click on “Format” drop-down, then on “Row Height”.
- In the “Row Height” dialog box, enter the value you want and click OK.
- Click on “File” (or Office Button for Excel 2007), then on “Save”.
- The “Save As” dialog box displays (if not, select a location).
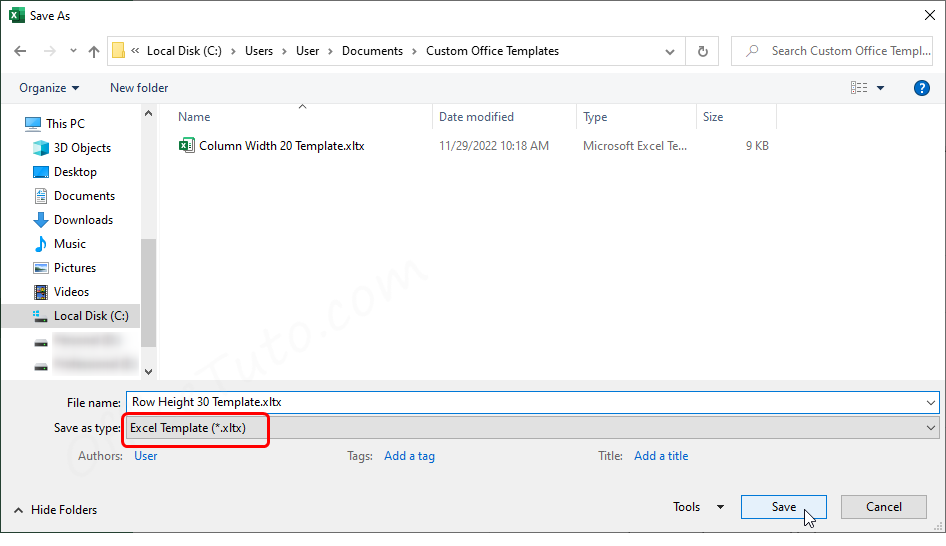
- Put a distinctive name for the template workbook in the “File name” field.
- In the “Save as type”, choose “Excel Template”, then click on “Save”.
- Excel saves your personal template in the appropriate templates folder.
Now that we have prepared a template with our custom row height, let’s see how to base the new workbooks on it.
b- Base your new workbooks on this Excel template
To use the previously created template with its custom row height for the new workbooks:
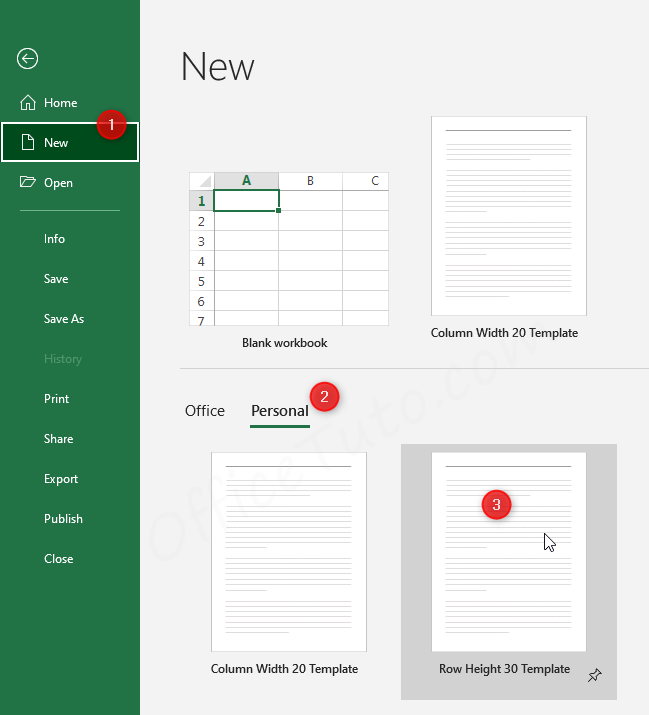
- Open Excel (In Excel 2007, you’ll need also to click on the Office Button).
- Click on “New”.
- For Excel 2013 and newer, click on “Personal” label.
For Excel 2010, click on “Available Templates”, then “My templates”.
For Excel 2007, click on “Templates”, then “My templates”. - Click on your personal template with custom row height.
- Excel creates a new workbook with the custom row height set by your template.
As you can notice, the advantage of this method is that it will let you create as many templates as you want, with different default row heights, and will let you choose the appropriate one for your needs, when in the process of creating a new workbook.
Note that you don’t need here to make your personal template the default one, as it will first eliminate the benefit of having multiple choices of different templates, and also because it would be simpler to just change the font or its size, as shown in the second method to change the row height.

Jeff Golden is an experienced IT specialist and web publisher that has worked in the IT industry since 2010, with a focus on Office applications.
On this website, Jeff shares his insights and expertise on the different Office applications, especially Word and Excel.